USB disks as tapes for Proxmox Backup Server (3/3): point & click
Part 2 built the setup from the shell. This part does it with a mouse: mhVTL Control for the virtual library, and the PBS web UI for the tape side. If you haven’t read part 1, it explains why you’d want PBS tape jobs on USB disks in the first place.
Not everything has a button yet: installing packages, turning on dashboard writes and binding the dock still take a few shell lines.
The setup is the same as before: PBS 4.2 with a datastore called store1, a USB dock, and disks to rotate. The test environment was a fresh Debian 13 VM with mhVTL 1.8.0+git20261101.7e3a101 and mhVTL Control 0.6.0, both from my OBS project.
The shell part
Add the repository, install both packages, and keep the kernel’s ch driver out. It leaks drive references every time a changer appears, and PBS doesn’t need it (part 2 has the details):
REPO=https://download.opensuse.org/repositories/home:/ciriarte:/mhvtl/Debian_13
install -d /etc/apt/keyrings
curl -fsSL -o /etc/apt/keyrings/mhvtl.asc $REPO/Release.key
echo "deb [signed-by=/etc/apt/keyrings/mhvtl.asc] $REPO/ /" \
    > /etc/apt/sources.list.d/mhvtl.list
apt-get update
# on a Proxmox kernel, use proxmox-default-headers instead:
apt-get install linux-headers-amd64 mhvtl mhvtl-control
echo "blacklist ch" > /etc/modprobe.d/mhvtl-no-ch.conf
# if this fails, ch is in use: reboot before going on
modprobe -r ch
The kernel module is built with DKMS for the running kernel. If you just upgraded the kernel, reboot first.
The dashboard is read-only out of the box. Edits need an API token and a small privileged helper that applies the changes:
TOKEN=$(openssl rand -hex 24); echo "$TOKEN"
echo "MHVTL_CONTROL_API_TOKEN=$TOKEN" >> /etc/mhvtl-control/mhvtl-control.env
chmod 600 /etc/mhvtl-control/mhvtl-control.env
systemctl enable --now mhvtl-control-apply.socket
systemctl enable mhvtl-control-apply-recover.service
systemctl enable --now mhvtl-control mhvtl.target
mhVTL Control listens on 127.0.0.1:8080, so reach it through an SSH tunnel from your workstation:
ssh -L 8080:127.0.0.1:8080 root@pbs.example.comOpen http://localhost:8080, click Target… and paste the token.
Create the library
The package ships two sample STK libraries. PBS can’t see them: it needs a changer that reports INQUIRY VPD page 0x83, and the STK models mhVTL emulates don’t. So we add a library with an IBM personality.
In Configuration, click New library…:
- Model: IBM 03584. The wizard notes it “reports VPD page 83h”, which is the point.
- ID 20, serial
MHV0020, 4 storage slots, 2 MAP (mail) slots. - One drive: IBM ULT3580-TD8, ID 21, serial
MHV002001. - For: Proxmox Backup Server. This turns on a check for what PBS needs.
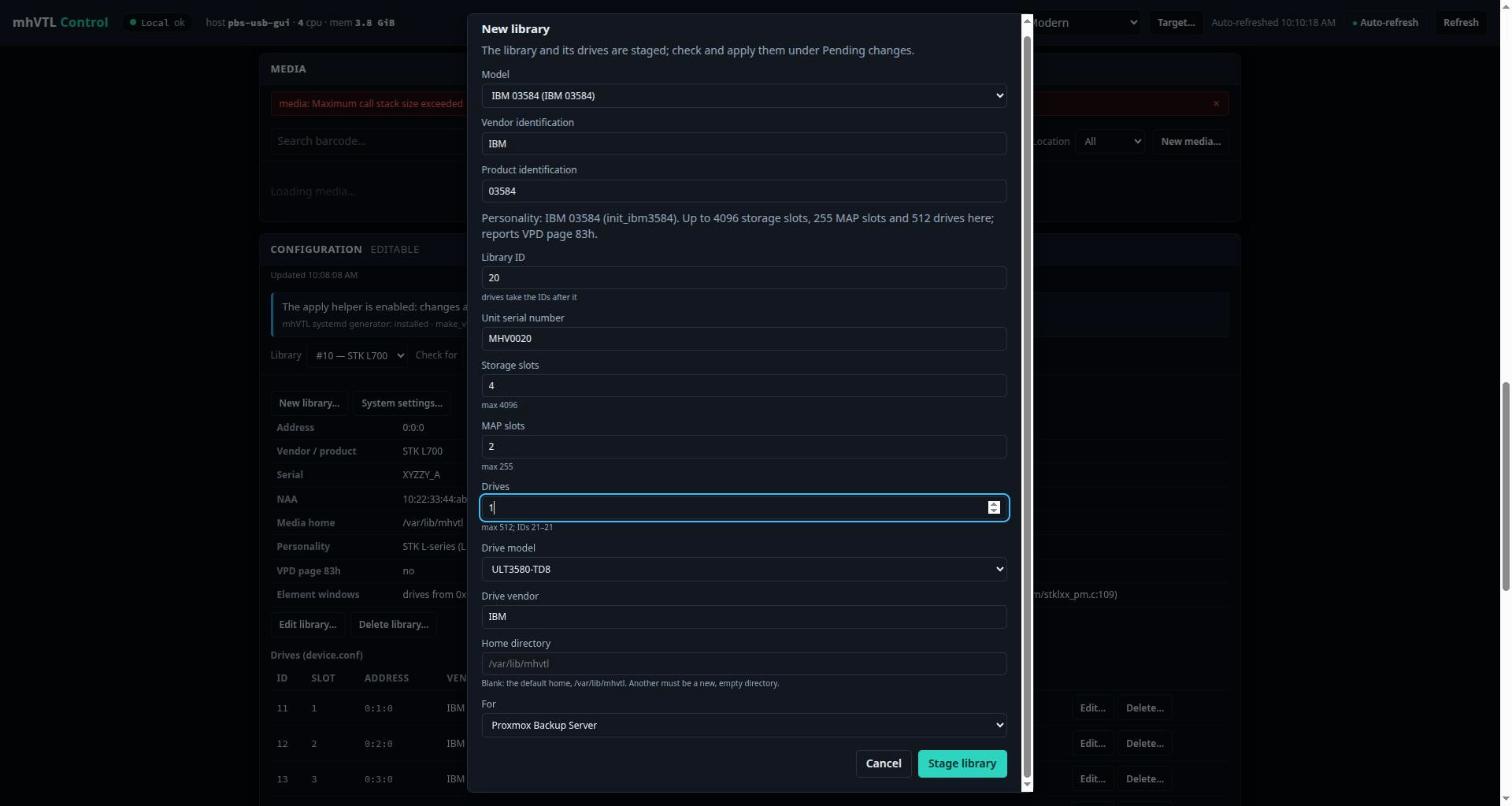
Click Stage library, then Check. Check is a dry run: it validates the new configuration and lists what the apply would restart. Here that’s only the two new daemons, and the PBS check passes:
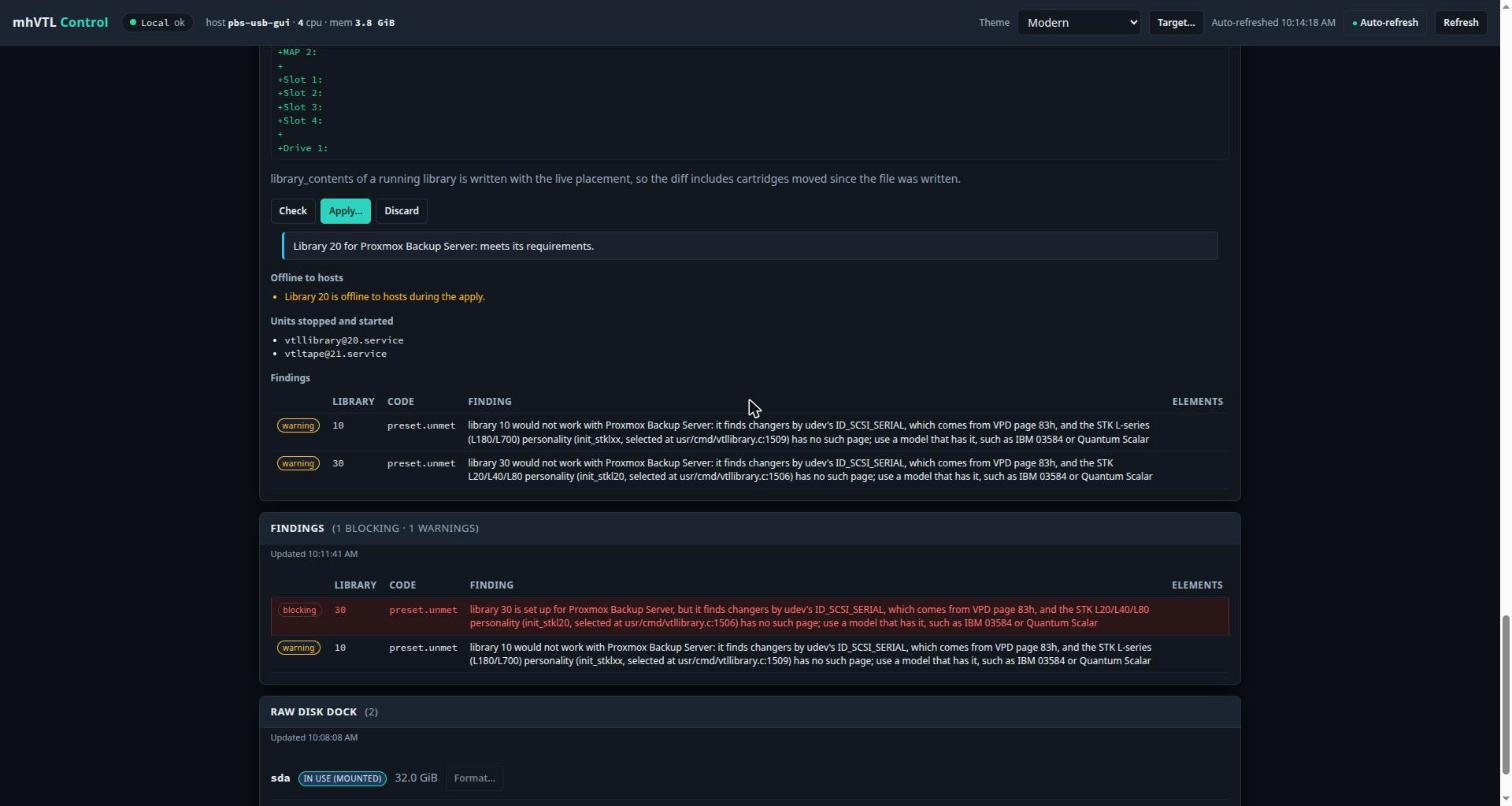
Click Apply. The library is live within seconds.
The wizard leaves drive compression off, which is fine: PBS chunks are already compressed. The sample libraries stay where they are (see Rough edges), so their drives will show up in PBS’s drive list later.
Bind the dock
This one is still a shell step. Plug a disk into the dock, find the port’s stable /dev/disk/by-path name (the usb- one, not usbv3-), and bind it to library 20. The second column is the intended mail slot; for now the cartridge lands in the first free one:
ls -l /dev/disk/by-path/ | grep -- -usb-
BAY=/dev/disk/by-path/pci-0000:00:01.0-usb-0:1:1.0-scsi-0:0:0:0
echo "20  1  $BAY" > /etc/mhvtl/mhvtl_raw_bays.conf
systemctl enable --now mhvtl-bay-monitor
The disk is blank, so the monitor logs “not placed” and waits.
Format the disk
In Raw Disk Dock, the disk shows up as “NO MVTL (UNFORMATTED)”. Click Format…, type the device name to confirm (this erases the disk), and give it a barcode. The L8 suffix makes it LTO-8 media, matching the drive:
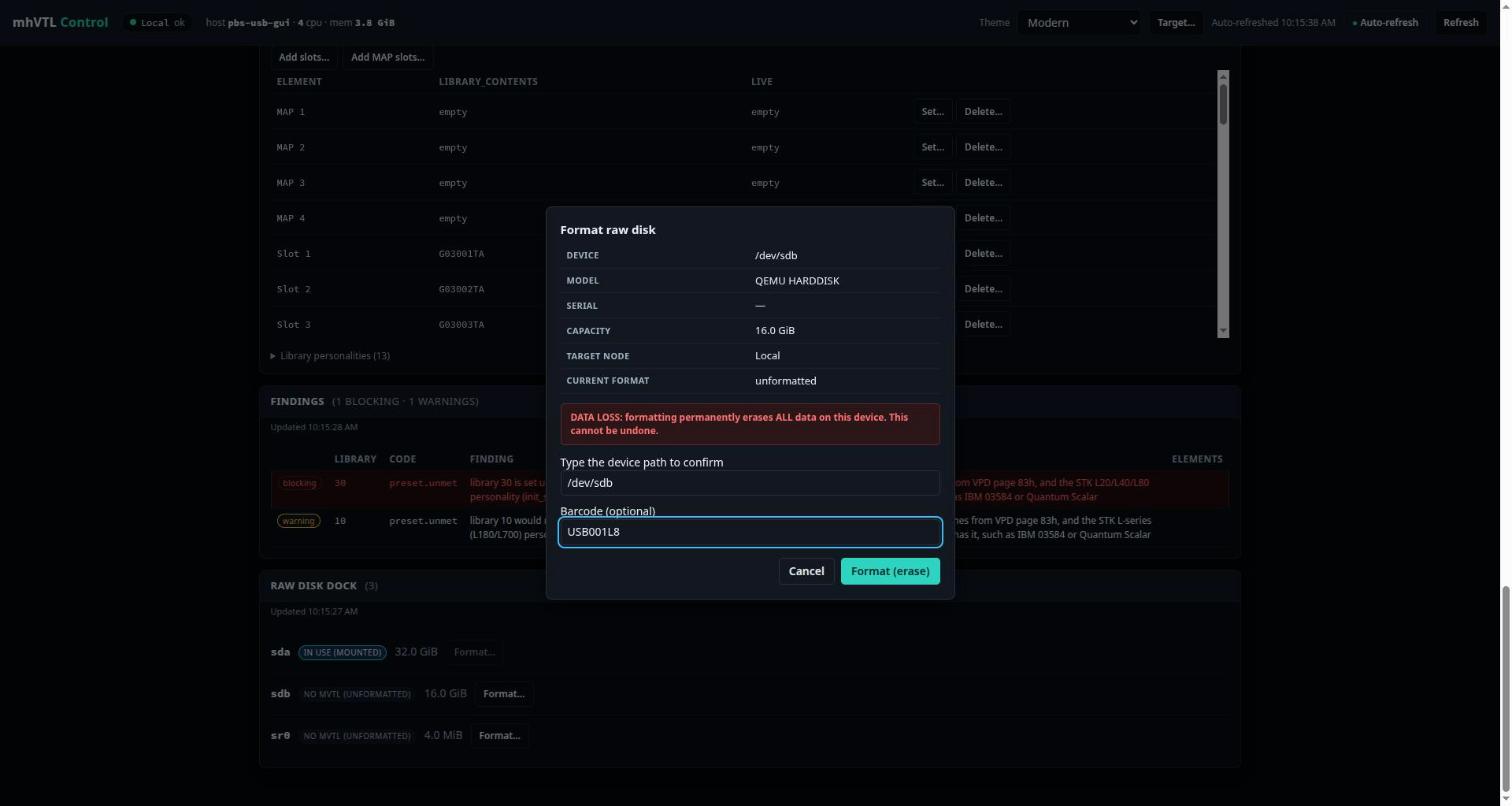
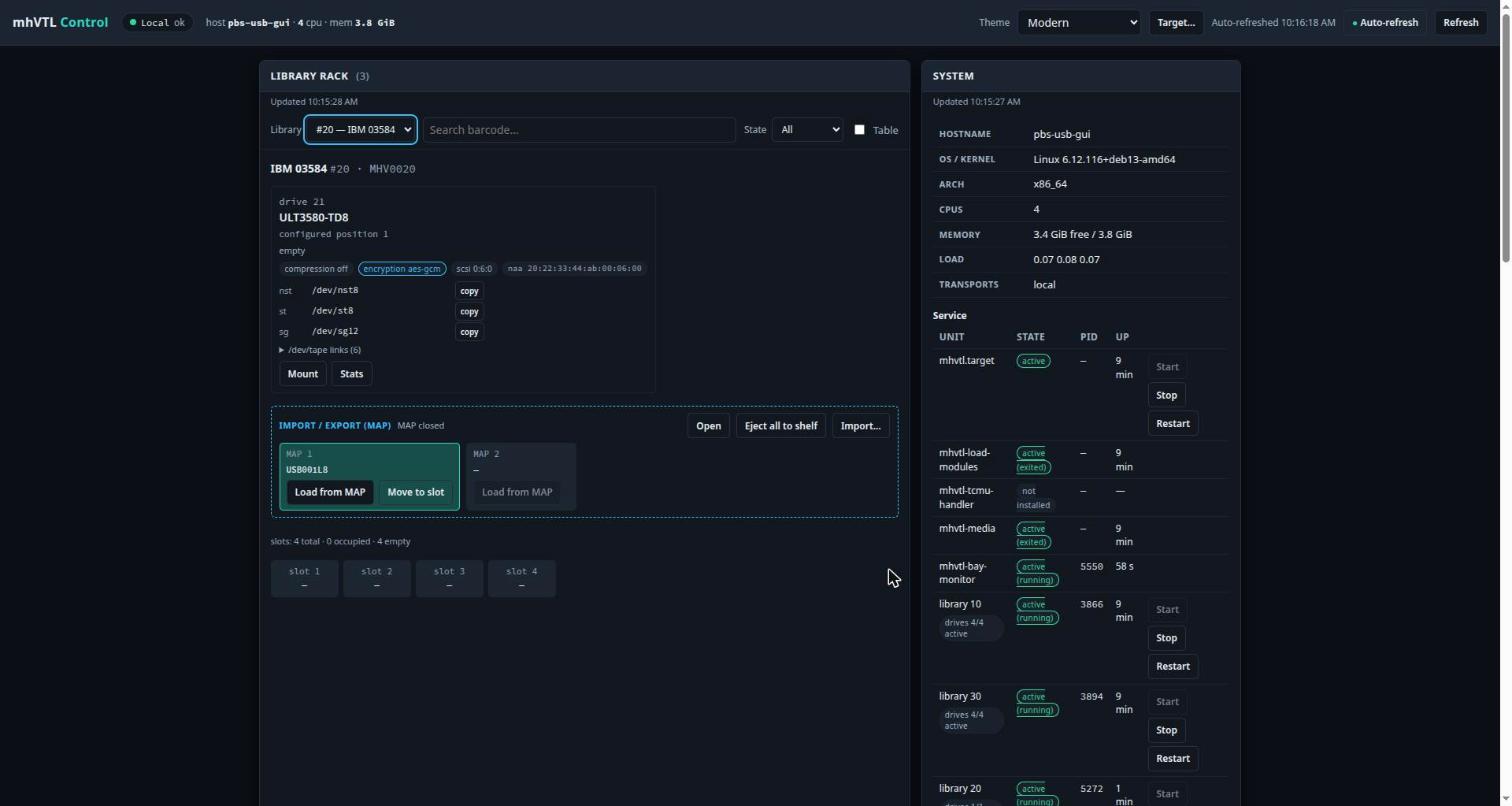
The bay monitor picks up the new cartridge right away, and the Library Rack shows it in MAP 1. The drive panel also shows encryption aes-gcm: once PBS sets a key, mhVTL encrypts every block with AES-256-GCM.
Switch to the PBS web UI, at https://<pbs>:8007.
Add the changer and the drive
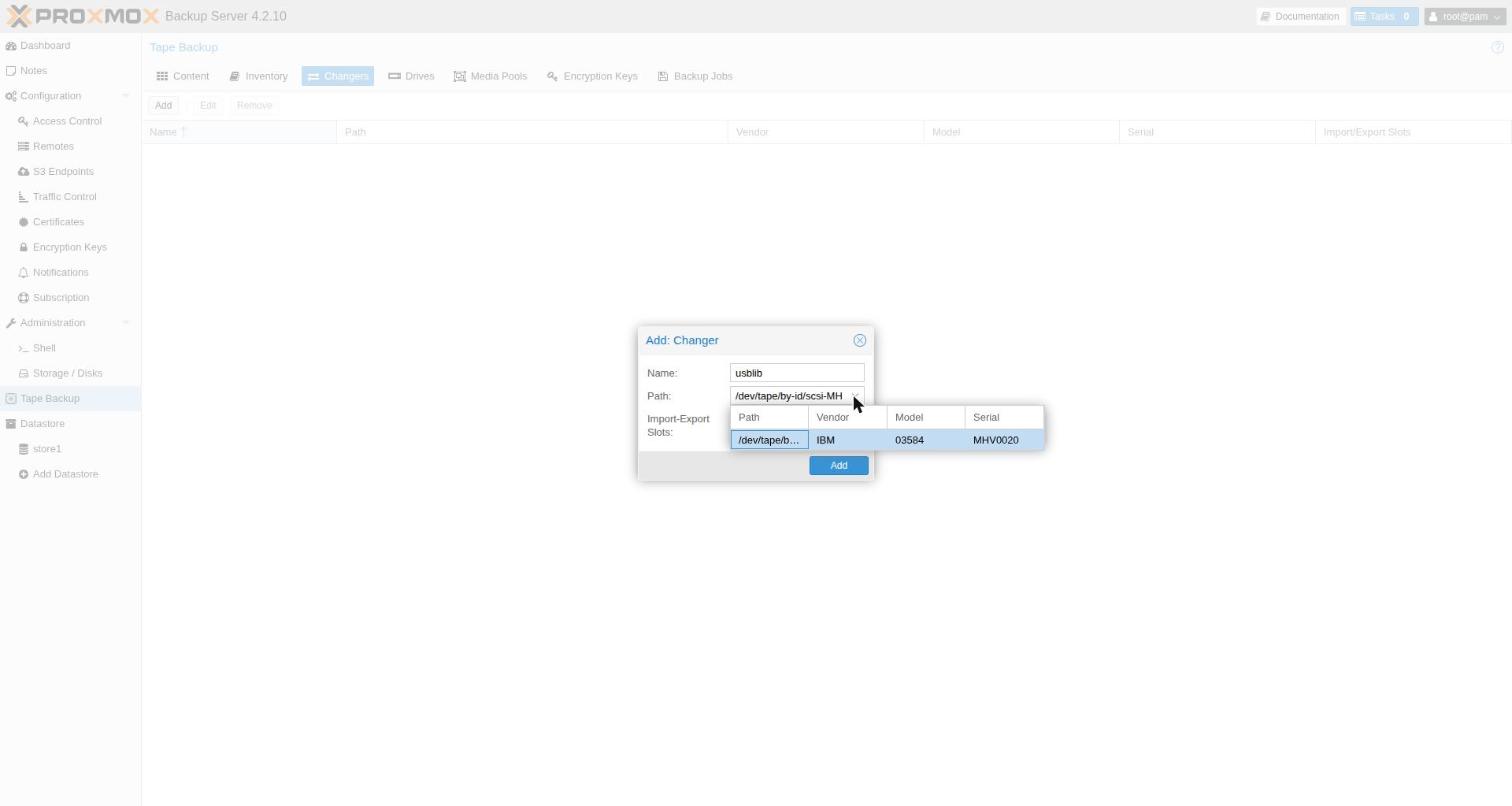
Tape Backup → Changers → Add. The path dropdown lists only the IBM changer (scsi-MHV0020). The STK samples are invisible to PBS, as expected. I named it usblib and left Import-Export Slots blank, since PBS reads them from the changer.
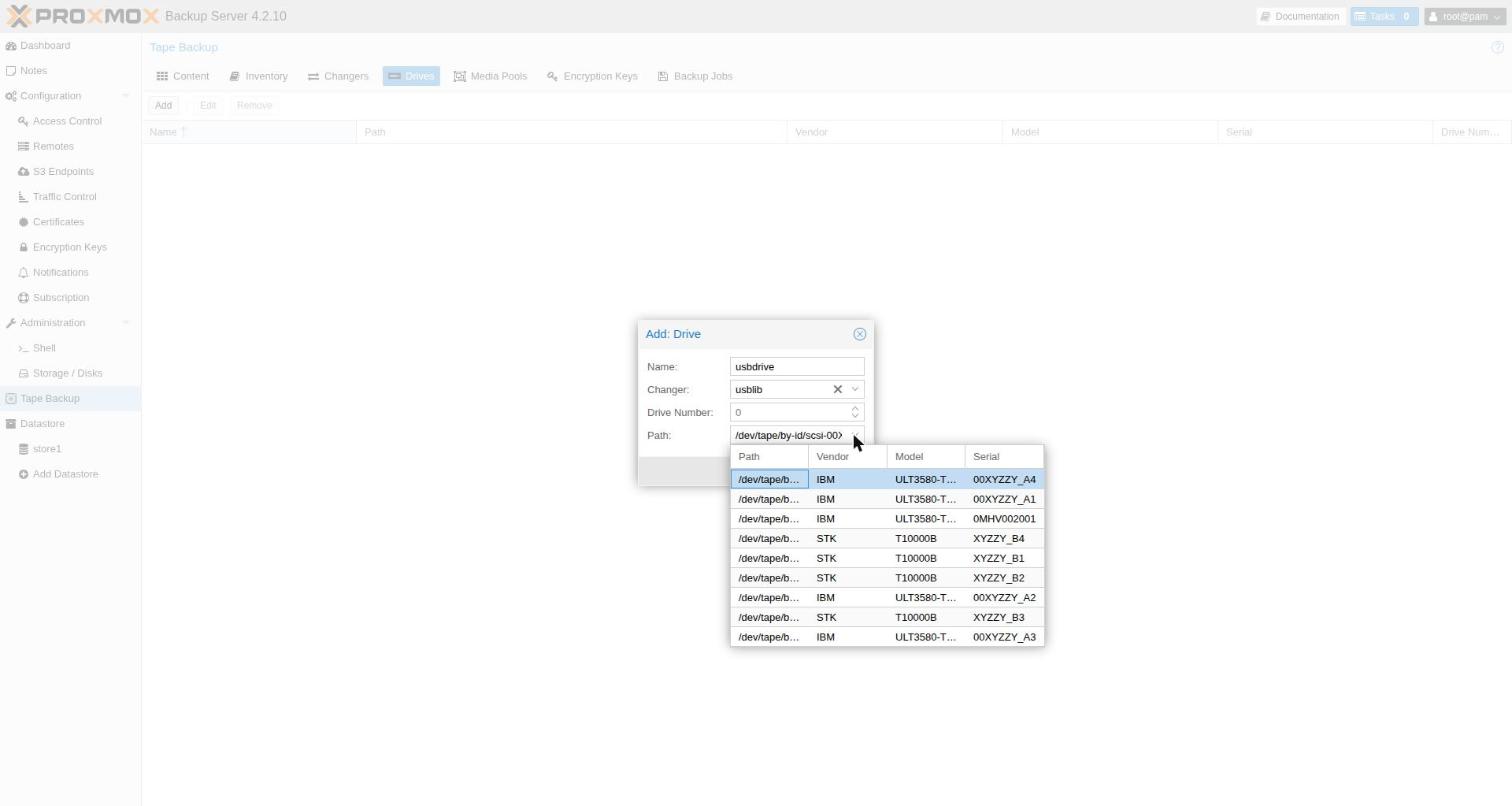
Drives → Add: name usbdrive, changer usblib, drive number 0. The path list shows every mhVTL drive, samples included, so pick the one with serial 0MHV002001:
Encryption key and media pool
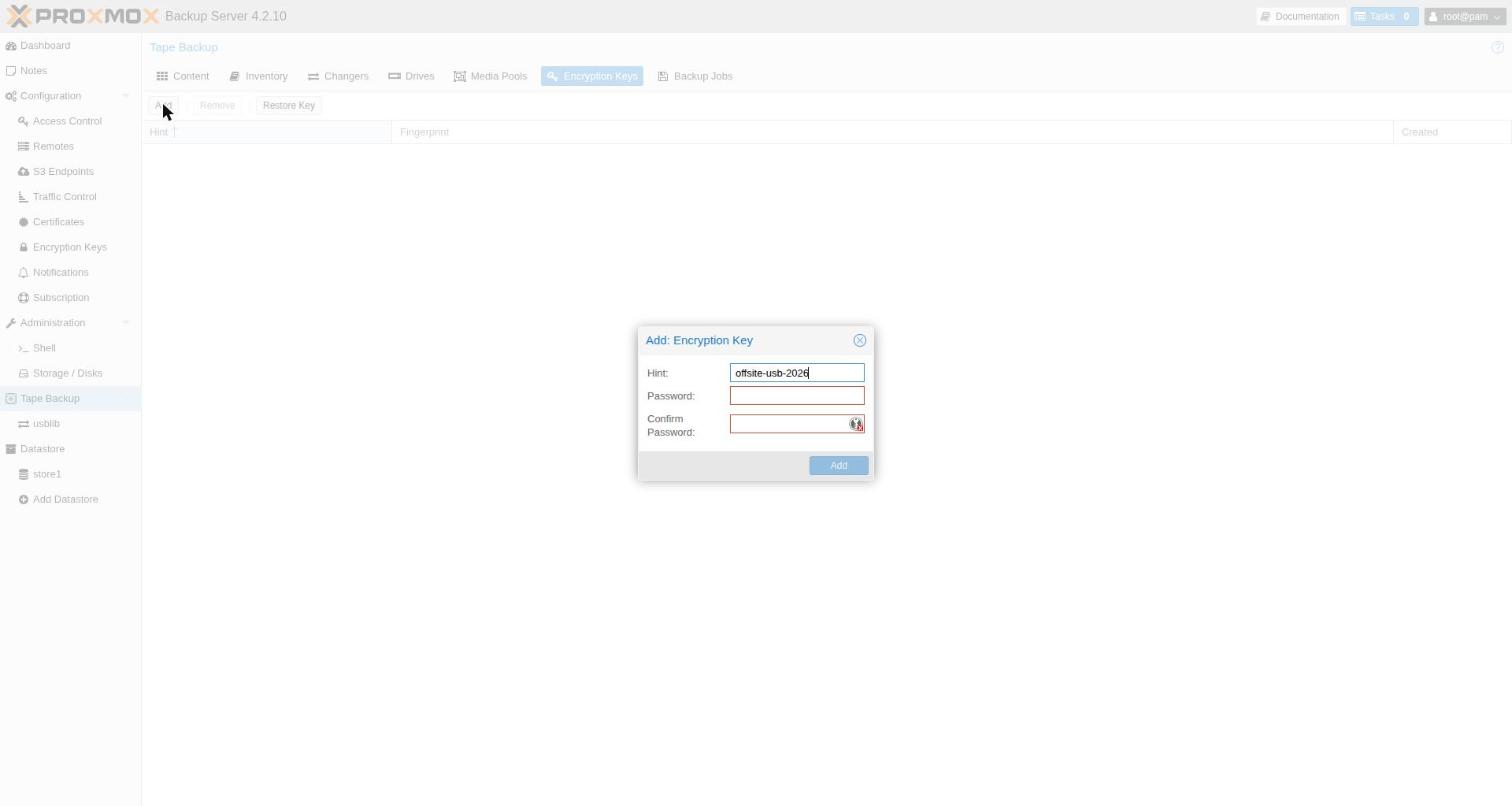
Encryption Keys → Add: a hint and a password. PBS then offers a paper key. Print it and keep it away from this server: without the key, the disks are just noise.
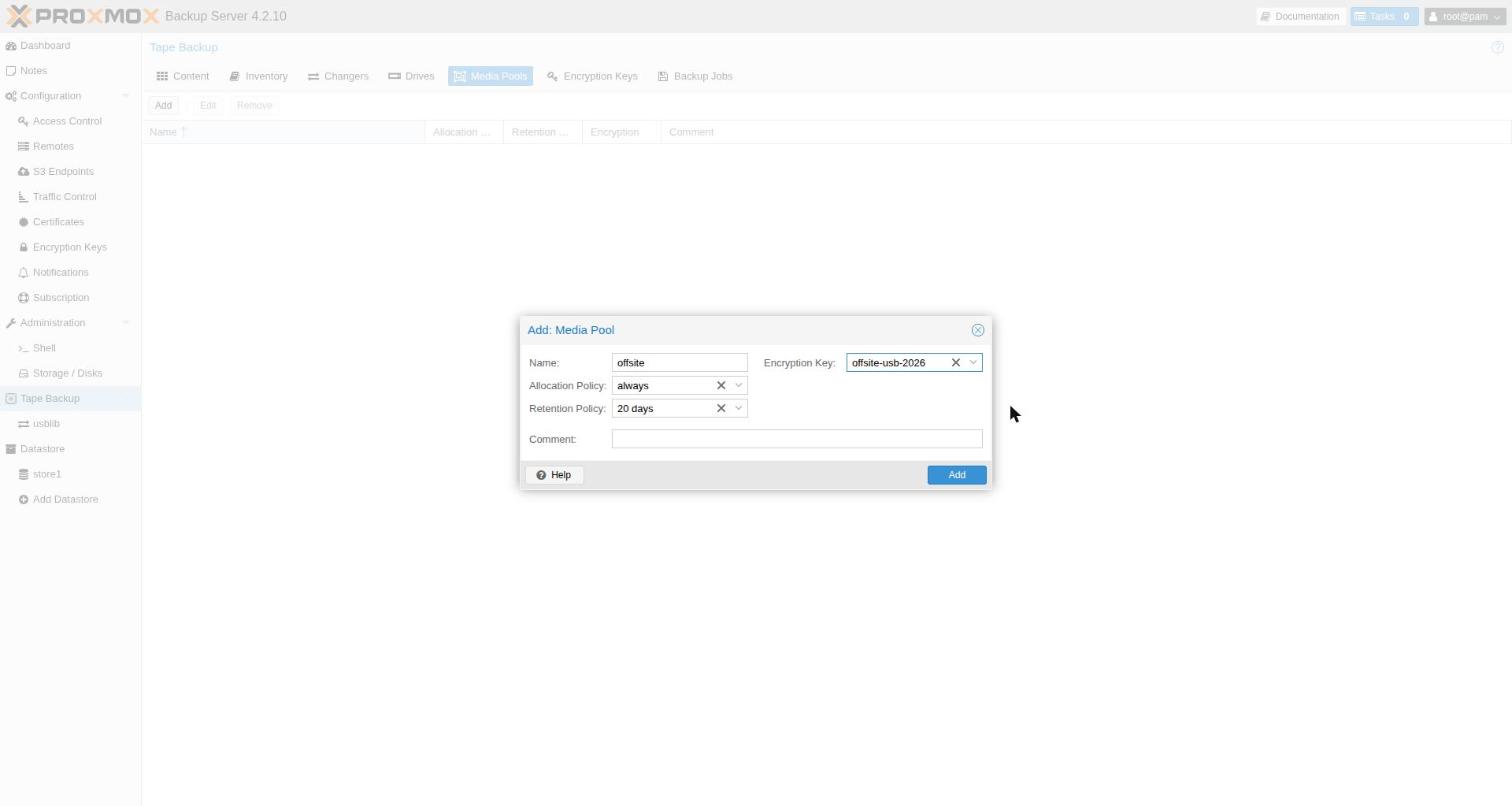
Media Pools → Add:
- Name: offsite
- Allocation: always. Every run starts a new media set. As long as a run fits on one disk, each disk is a self-contained copy that can leave the building.
- Retention: 20 days. It has to be shorter than the rotation cycle: three disks rotated weekly come back after 21 days.
- Encryption key: the one you just created.
Label the disk
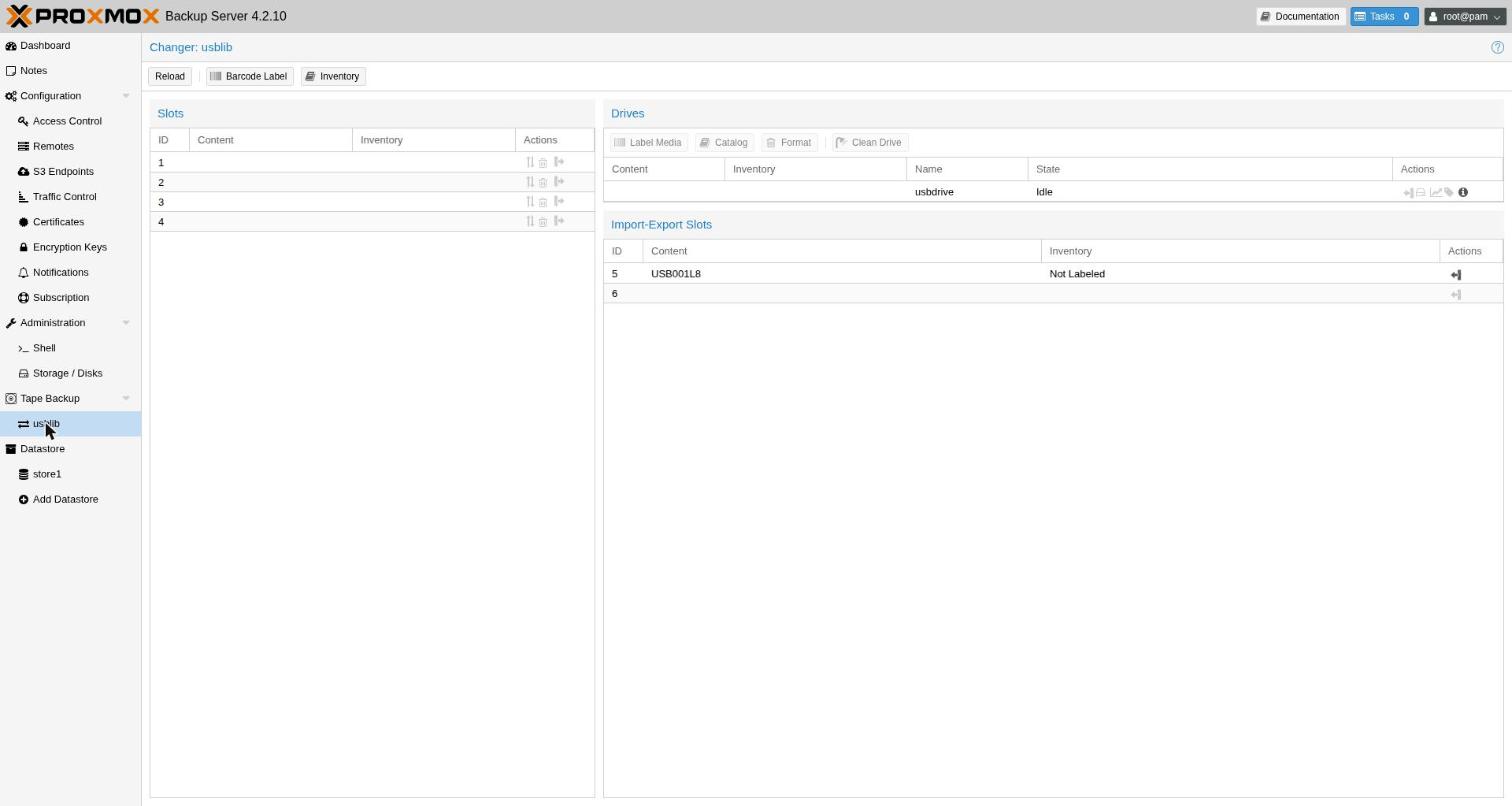
Open the changer (usblib in the left tree). The disk sits in I/E slot 5, “Not Labeled”. Mail slots are numbered after the four storage slots. PBS won’t label media in a mail slot, so click Import and move it to slot 1, then Barcode Label with pool offsite.
Back up
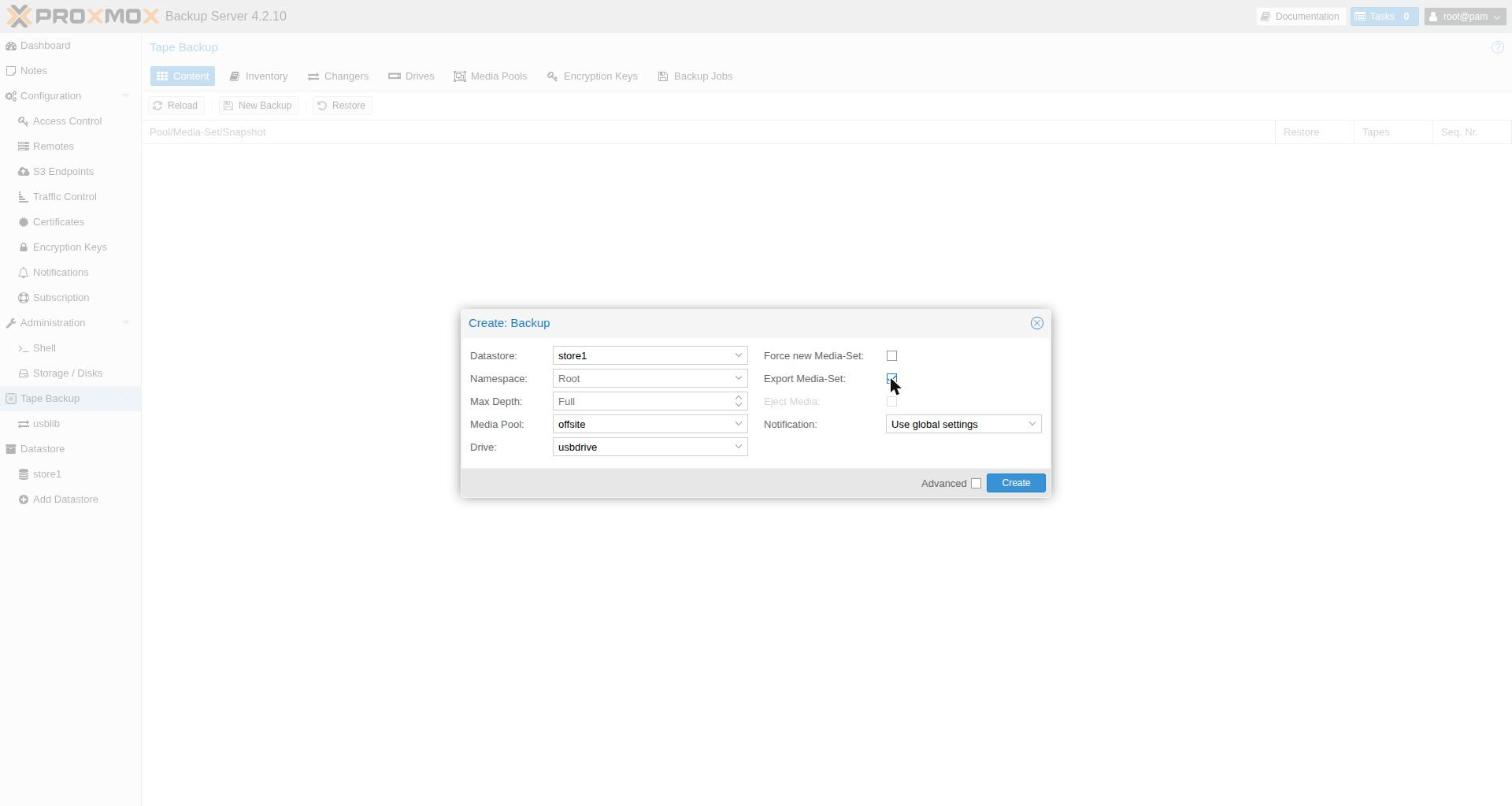
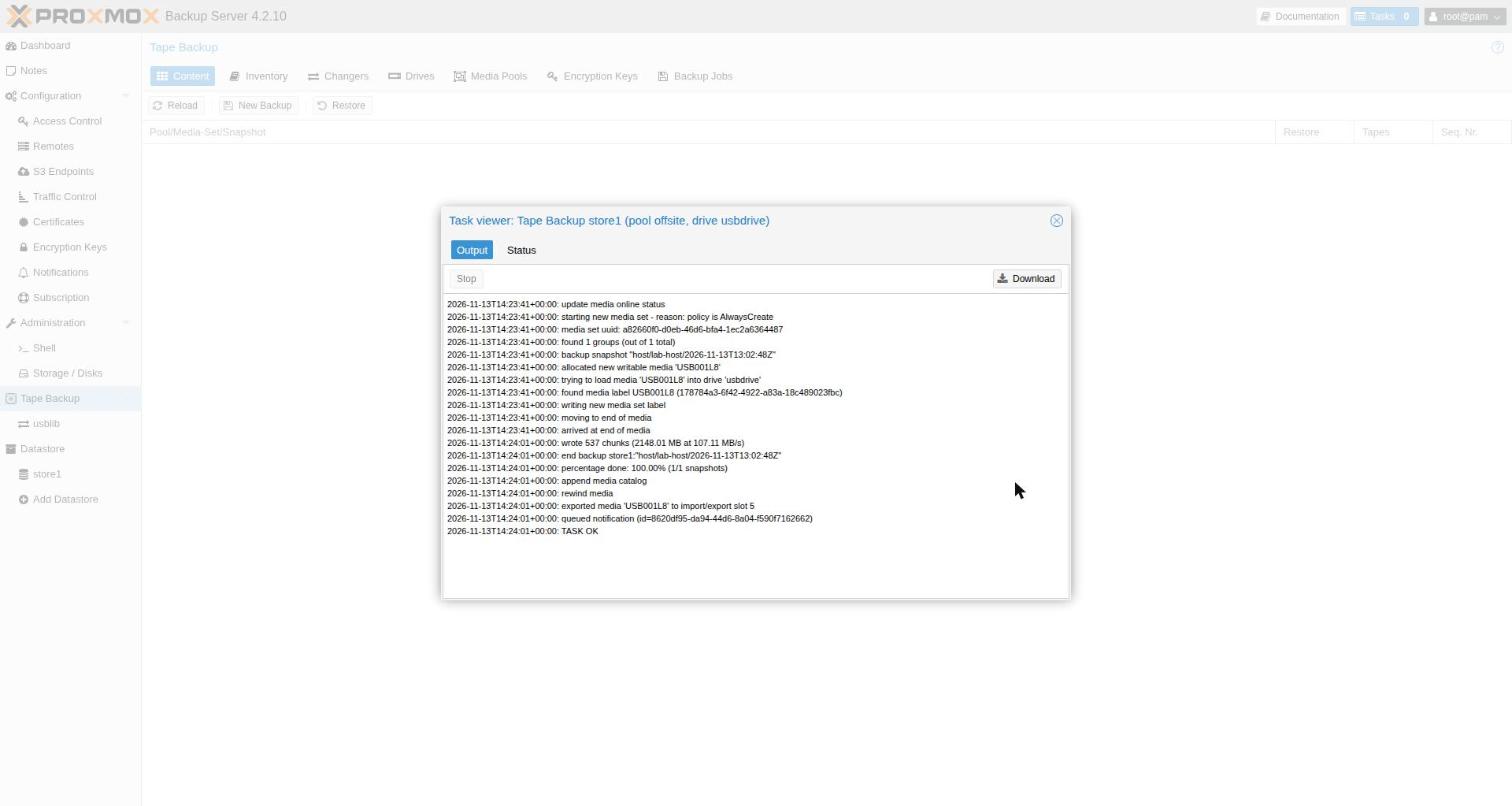
Content → New Backup: datastore store1, pool offsite, drive usbdrive, and tick Export Media-Set. That moves the cartridge back to the mail slot when the job ends, ready to unplug.
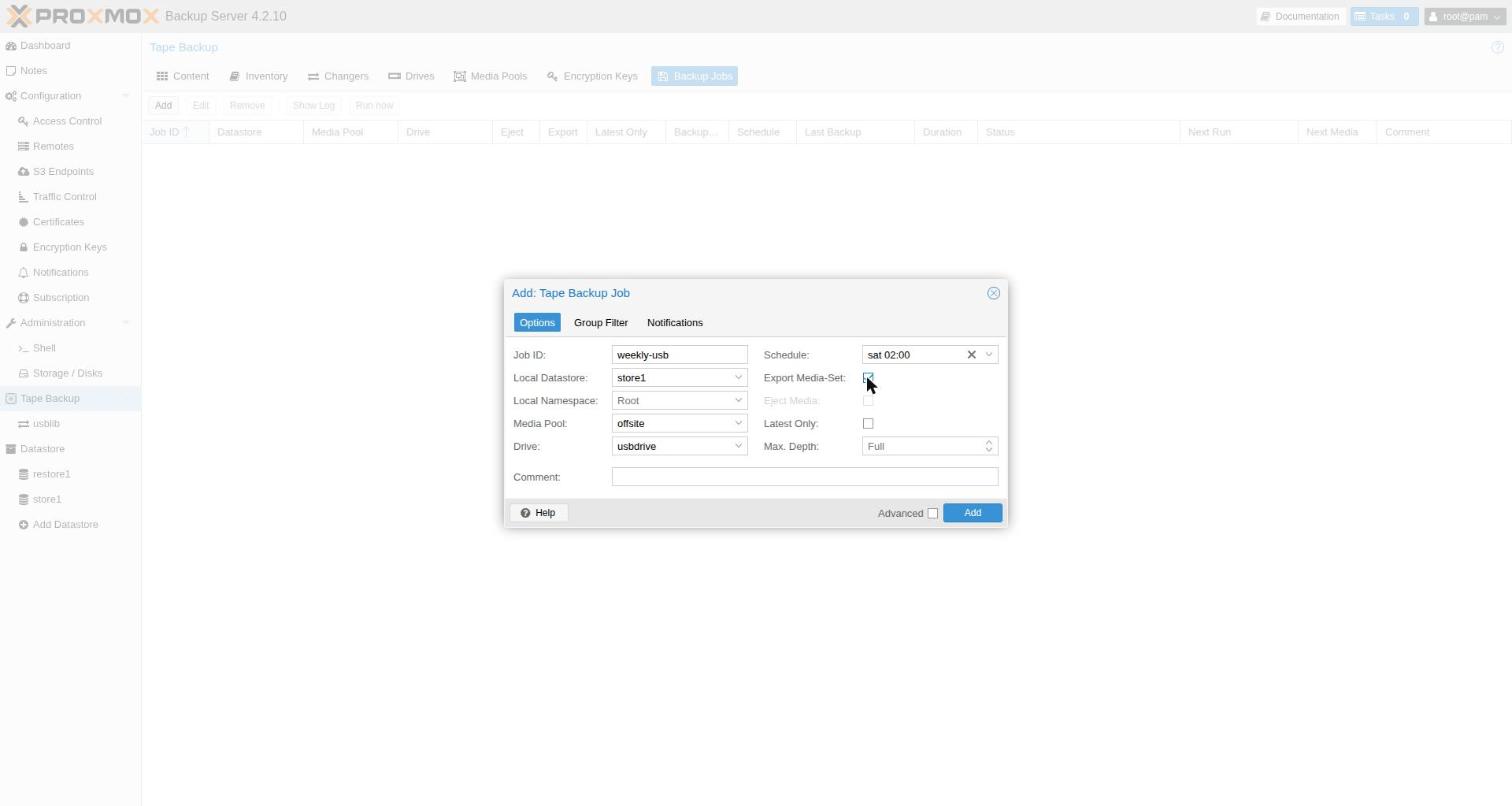
For the weekly routine, add a job under Backup Jobs → Add: same datastore, pool and drive, schedule sat 02:00, Export Media-Set ticked.
Pull the disk
When the task log says the media was exported, unplug the disk. The bay monitor takes the cartridge out of the library. PBS caches what it knows, so click Reload in Inventory: the disk is listed as offline, with its catalog.
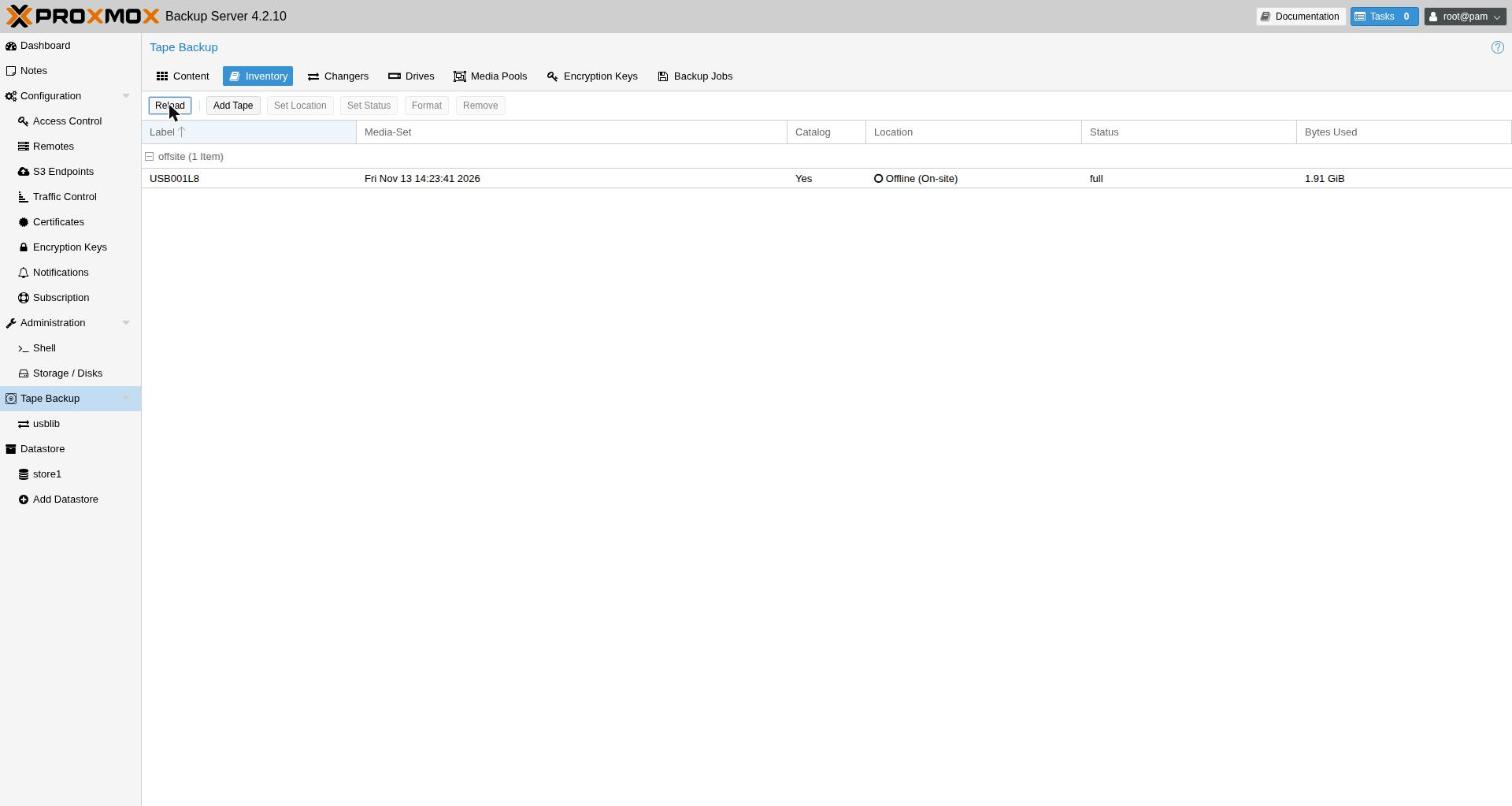
The changer view also keeps showing the cartridge until you click Reload there.
Next week: plug in the disk that is due, Import it to a storage slot, and let the job run. An expired disk is reused automatically. Formatting and labeling are only for new disks.
Restore
Plug the disk back in. Once it’s in the mail slot, Reload the changer and Import it to a slot. Then in Content, click the restore icon next to the media set, pick the snapshots, and choose a target drive and datastore:
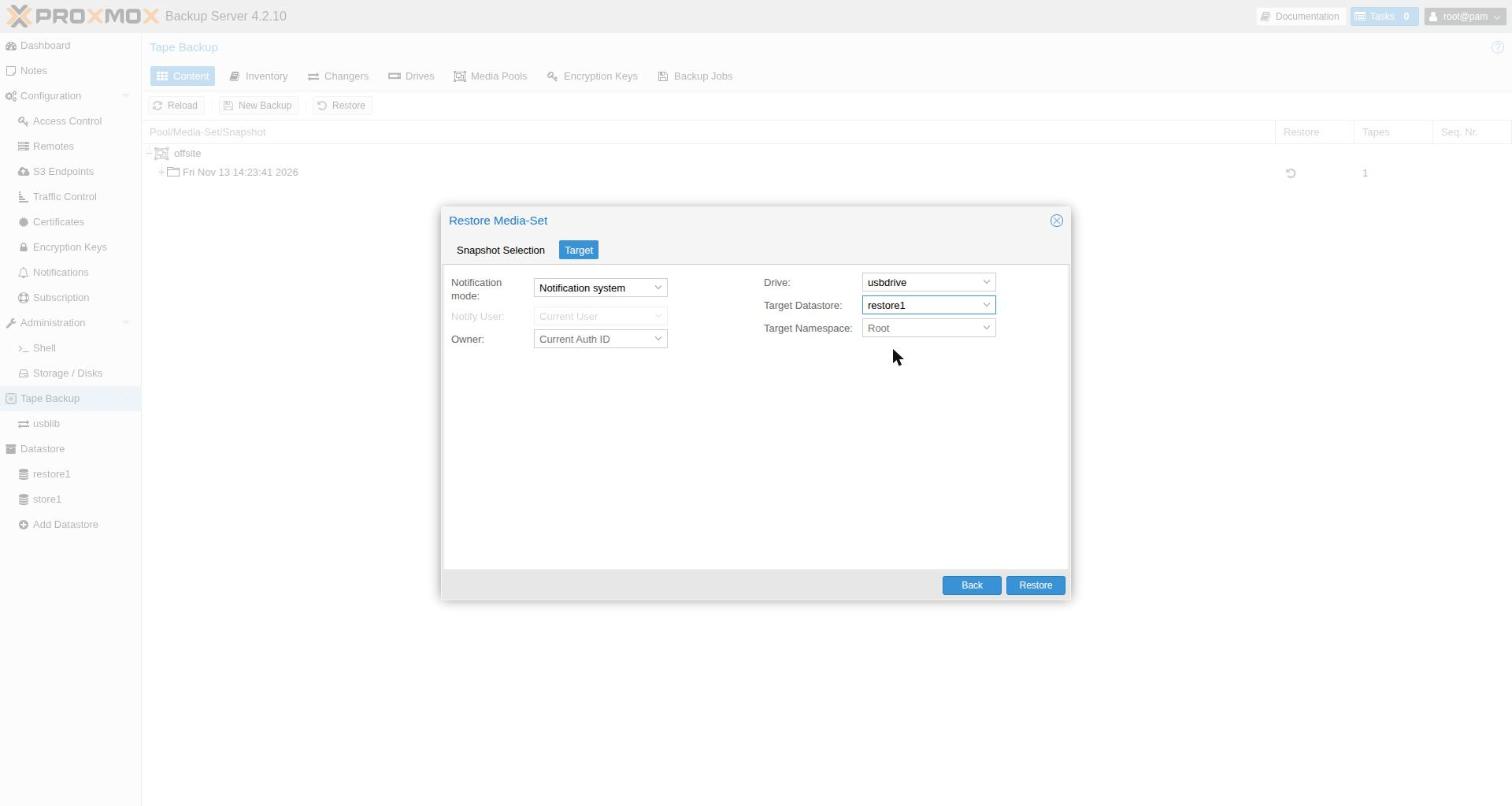
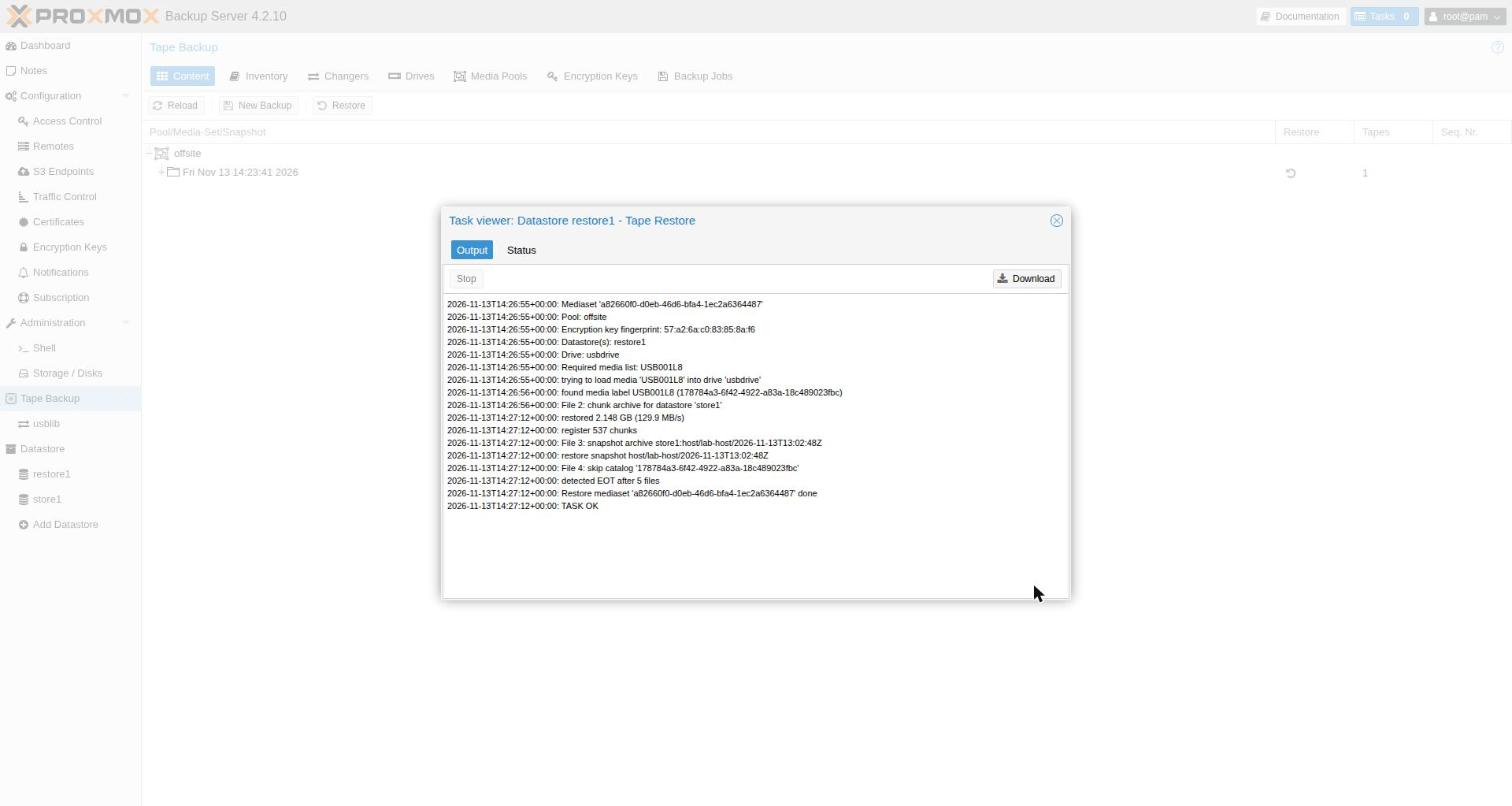
The log shows the key fingerprint the media set was encrypted with, and the restore took 2.148 GB back into the datastore. The 2 GiB random file in that snapshot came back with the same SHA-256 as the original.
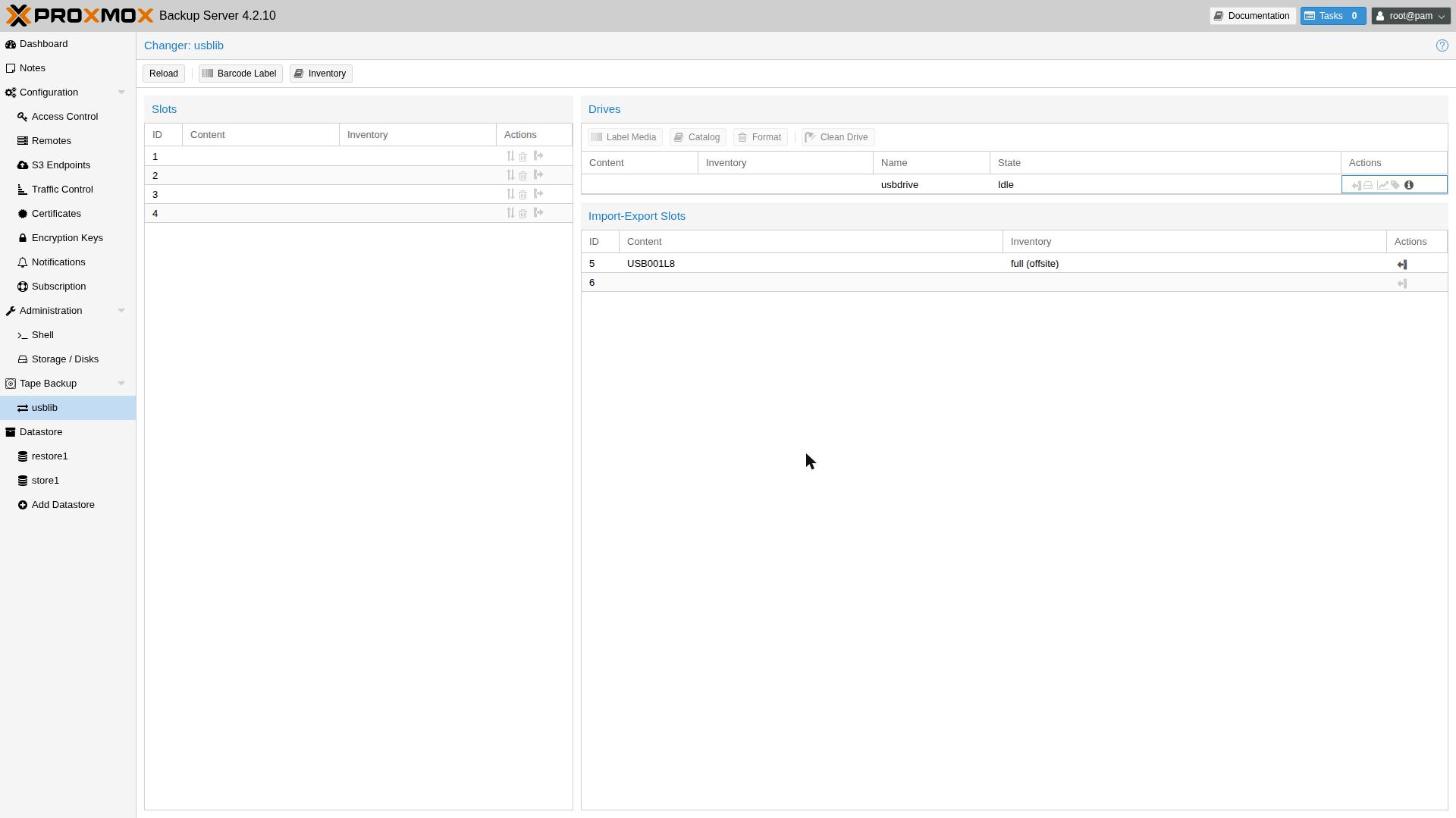
The restore leaves the disk in the drive. Before unplugging it, send it back to the mail slot from the changer view. Click Unload in the drive’s actions, which puts the cartridge back in slot 1. Then click Transfer on slot 1 and pick I/E slot 5. (The icon next to Transfer is Format. Don’t confuse the two.)
Restoring on a rebuilt PBS takes a few more steps, starting with restoring the key from the paper copy. Part 2 has the commands, all run in a test environment.
Rough edges
mhVTL Control 0.6.0 is young, and this run turned up a few things I’ll fix:
- Sample libraries that hold cartridges can’t be deleted from the dashboard: the delete fails its own check. They don’t get in the way, apart from a longer drive list in PBS.
- The media panel shows a “Maximum call stack size exceeded” error.
- Raw Disk Dock offers Format… for the CD-ROM drive, and names disks by
sdXinstead of their bay.
None of them got in the way of the procedure. The caveats from part 2 apply here too: wait for the mail slot before pulling a disk, use a dock that honors cache flushes, and test a restore before you rely on it.
Edit this post on GitHub · found an error? Pull requests are welcome.