ESXi on Proxmox as nested hypervisor
Thanks to the work of William Lam, running ESXi on top of ESXi for testing/lab purposes is really straightforward.
Now, if for some reason you cannot install ESXi on your home lab machine, and like me you use Proxmox, this post is for you.
Proxmox Virtual Environment or PVE is a nice KVM-based virtualization solution from Proxmox Server Solutions GmbH. It’s free to use, and has a wide userbase.
The starting point would be a properly setup Proxmox host for nested virtualization. After you get it up & running, we’re ready to move forward.
The ESXi appliance
This ESXi appliance is pre-configured to simplify deployment as a nested hypervisor. With each new vSphere release, a matching appliance is created and published.
Downloading the appliance
The mentioned appliances are published via a public vSphere Content Library. To get a list of the available releases, we can run the following command from your PVE host:
BASEURL=https://download3.vmware.com/software/vmw-tools
curl -s ${BASEURL}/items.json |grep -A 1 "hrefs"|grep -vE "\-\-|hrefs"|sort |cut -f 2 -d '"'|cut -f 1 -d "/"|sort -u
The output should be similar to:
Nested_ESXi6.0u3_Appliance_Template_v1.0
Nested_ESXi6.5d_Appliance_Template_v1.0
Nested_ESXi6.5u1_Appliance_Template_v1.0
Nested_ESXi6.5u2_Appliance_Template_v1.0
Nested_ESXi6.5u3_Appliance_Template_v1.0
Nested_ESXi6.7_Appliance_Template_v1.0
Nested_ESXi6.7u1_Appliance_Template_v1.0
Nested_ESXi6.7u2_Appliance_Template_v1.0
Nested_ESXi6.7u3_Appliance_Template_v1.0
Nested_ESXi7.0_Appliance_Template_v1.0
Nested_ESXi7.0u1_Appliance_Template_v1.0
Nested_ESXi7.0u1d_Appliance_Template_v1.0
Nested_ESXi7.0u2a_Appliance_Template_v2.0
Nested_ESXi7.0u2_Appliance_Template_v1.0
Nested_ESXi7.0u3_Appliance_Template_v1.0
Nested_ESXi7.0u3c_Appliance_Template_v1.0
Nested_ESXi7.0u3d_Appliance_Template_v1.0
Nested_ESXi7.0u3e_Appliance_Template_v1.0
Nested_ESXi7.0u3f_Appliance_Template_v1.0
Nested_ESXi7.0u3g_Appliance_Template_v1.0
Nested_ESXi7.0u3i_Appliance_Template_v1.0
Nested_ESXi7.0u3j_Appliance_Template_v1.0
Nested_ESXi7.0u3k_Appliance_Template_v1.0
Nested_ESXi7.0u3l_Appliance_Template_v1.0
Nested_ESXi7.0u3m_Appliance_Template_v1.0
Nested_ESXi8.0a_Appliance_Template_v1.0
Nested_ESXi8.0b_Appliance_Template_v1.0
Nested_ESXi8.0c_Appliance_Template_v1.0
Nested_ESXi8.0_IA_Appliance_Template_v2.0
Nested_ESXi8.0u1a_Appliance_Template_v1
Nested_ESXi8.0u1_Appliance_Template_v1.0
Pick the one you would like to use, and download all the related files:
# We create the destination directory
mkdir esxi;cd esxi
# Variable holding the chosen appliance name
APPLIANCE=Nested_ESXi8.0u1a_Appliance_Template_v1
# Get the list of the files we'll fetch
FILES=$(curl -s ${BASEURL}/items.json |grep -A 1 "hrefs"|grep -vE "\-\-|hrefs"|sort |cut -f 2 -d '"'|grep $APPLIANCE)
# For loop to download file by file
for F in $FILES
do
    wget ${BASEURL}/${F}
done
You should end up with a group of files similar to:
root@bigiron:~/esxi# ls -l
total 1696791
-rw-r--r-- 1 root root   865786368 Jun  2 11:38 Nested_ESXi8.0u1a_Appliance_Template_v1-disk1.vmdk
-rw-r--r-- 1 root root       68096 Jun  2 11:35 Nested_ESXi8.0u1a_Appliance_Template_v1-disk2.vmdk
-rw-r--r-- 1 root root       68608 Jun  2 11:35 Nested_ESXi8.0u1a_Appliance_Template_v1-disk3.vmdk
-rw-r--r-- 1 root root         389 Jun  2 11:35 Nested_ESXi8.0u1a_Appliance_Template_v1.mf
-rw-r--r-- 1 root root       54052 Jun  2 11:35 Nested_ESXi8.0u1a_Appliance_Template_v1.ovf
Importing the appliance
After downloading the files, we’ll create a virtual machine using the OVF as source. It’s mostly used to import the disk images, large parts of the file are actually ignored (advanced configuration parameters for example are not taken into account). For such task & initial VM configuration, I’ve created a quick script (create-esxi.sh) to be run in your PVE host.
#!/bin/bash

# We need at least 1 VLAN for management & another for vSAN traffic
VLANLAB=302
VLANVSAN=303
# Bridge interface to use (VLAN aware)
BRIDGE=vmbr0
# Storage destination for the appliance to live in
STORAGE=dstore01
# Source OVF file, descriptor of the appliance
OVF=esxi/Nested_ESXi8.0u1a_Appliance_Template_v1.ovf
# Template/appliance name as defined in the OVF file, for us to later rename the VM.
TMPL_NAME=$(grep "<Name>" $OVF| cut -f 2 -d ">" |cut -f 1 -d "<" |sed 's/_//g')

# We need at least the name of the VM to create as script parameter
if [ $# -ne 1 ]
then
        echo "usage $0 <vm name>"
        exit 1
else
        VMNAME=$1
fi

# Basic VM creation and disk files import
qm importovf $(pvesh get /cluster/nextid) ${OVF} ${STORAGE} -format qcow2

# We get the ID of the created VM
NEWVM=$(qm list|grep ${TMPL_NAME}|awk '{ print $1 }')

# We define initial configuration. In this case, 12 cores in total, 2 sockets & 64GB of RAM. EFI boot.
qm set $NEWVM --name $VMNAME --bios ovmf --machine q35 \
--numa 1 --sockets 2 --cores 6 --cpu cputype=host \
--scsihw pvscsi \
--memory 65536 --hugepages 1024 \
--efidisk0 ${STORAGE}:0,efitype=4m,format=qcow2

# We add two network interfaces with the correct VLAN mapping
qm set $NEWVM \
--net0 model=vmxnet3,bridge=${BRIDGE},firewall=0,tag=${VLANLAB} \
--net1 model=vmxnet3,bridge=${BRIDGE},firewall=0,tag=${VLANVSAN}

# The import command attaches the disks to a SCSI controller, the VM doesn't recognize the VMWare PVSCSI controller unluckily. We detach disks from that controller.
for DISK in $(qm config $NEWVM |grep ^scsi|grep $NEWVM|cut -f 1 -d ":")
do
        qm set $NEWVM --delete $DISK
done

# Reattach of disks to SATA controller. The appliance is happier with that one.
n=0
for DISK in $(qm config $NEWVM|grep ^unused|awk '{ print $2 }')
do
        qm set $NEWVM -sata${n} $DISK
        n=$(( $n + 1 ))
done

# Define boot disk
qm set $NEWVM --boot order=sata0

# Start VM
qm start $NEWVM
To create 3 virtual machines for our initial cluster, we just execute:
./create-esxi.sh esxi01
./create-esxi.sh esxi02
./create-esxi.sh esxi03
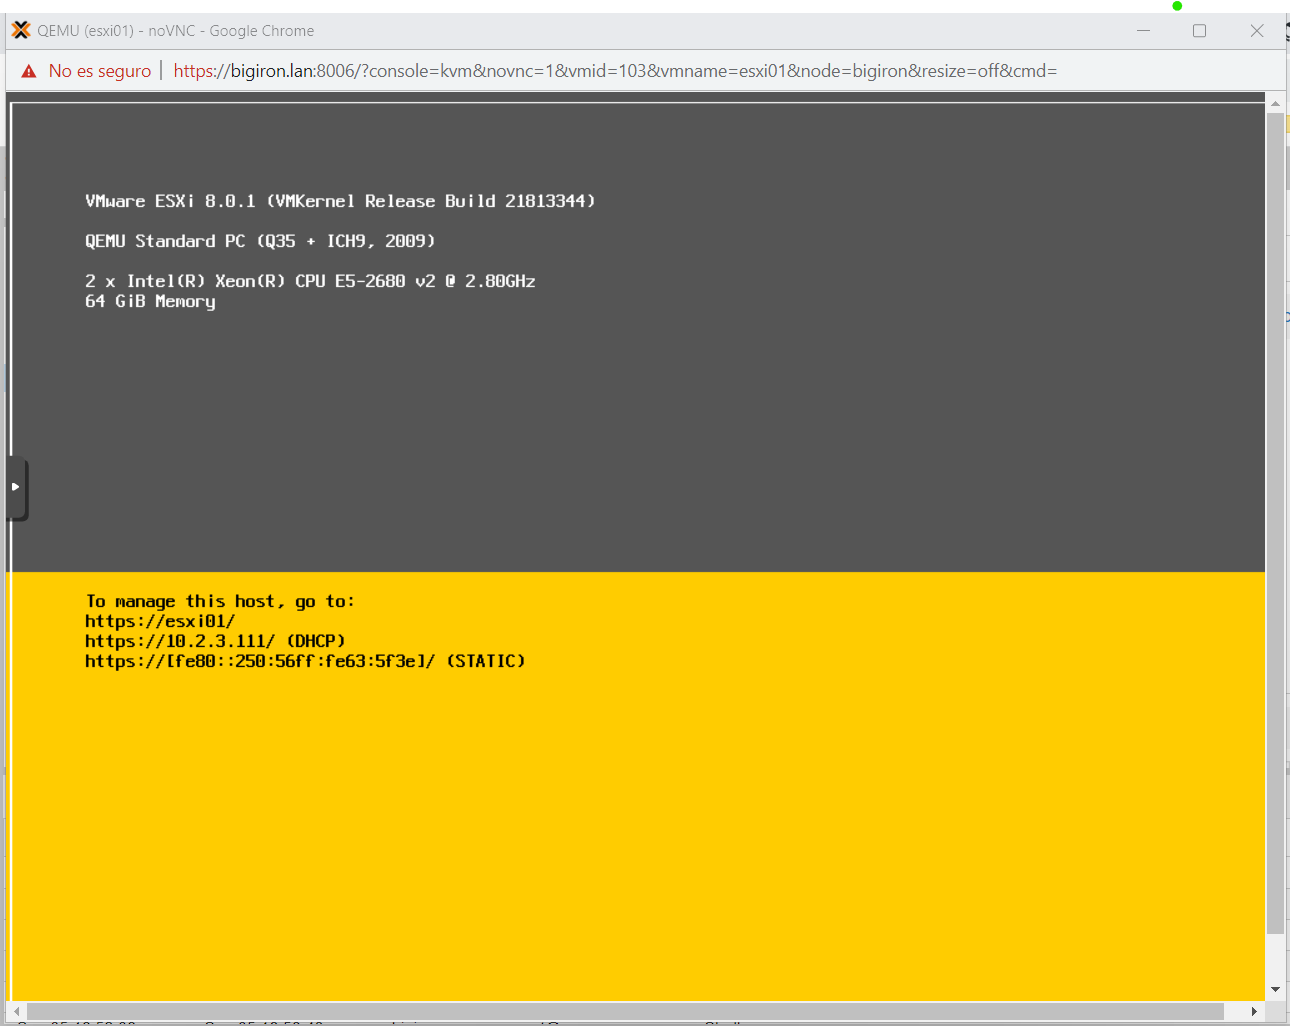
After that, manual initial setup of ESXi is required (hostname, static IP or sending hostname in DHCP request, etc)
Outcome
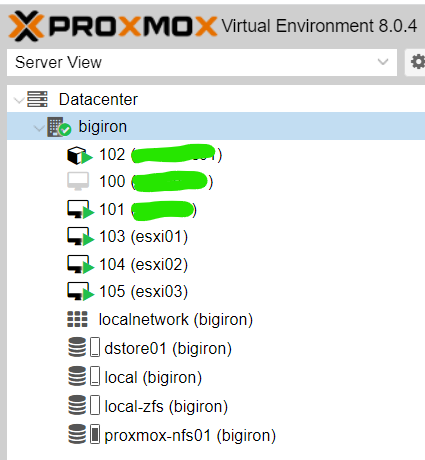
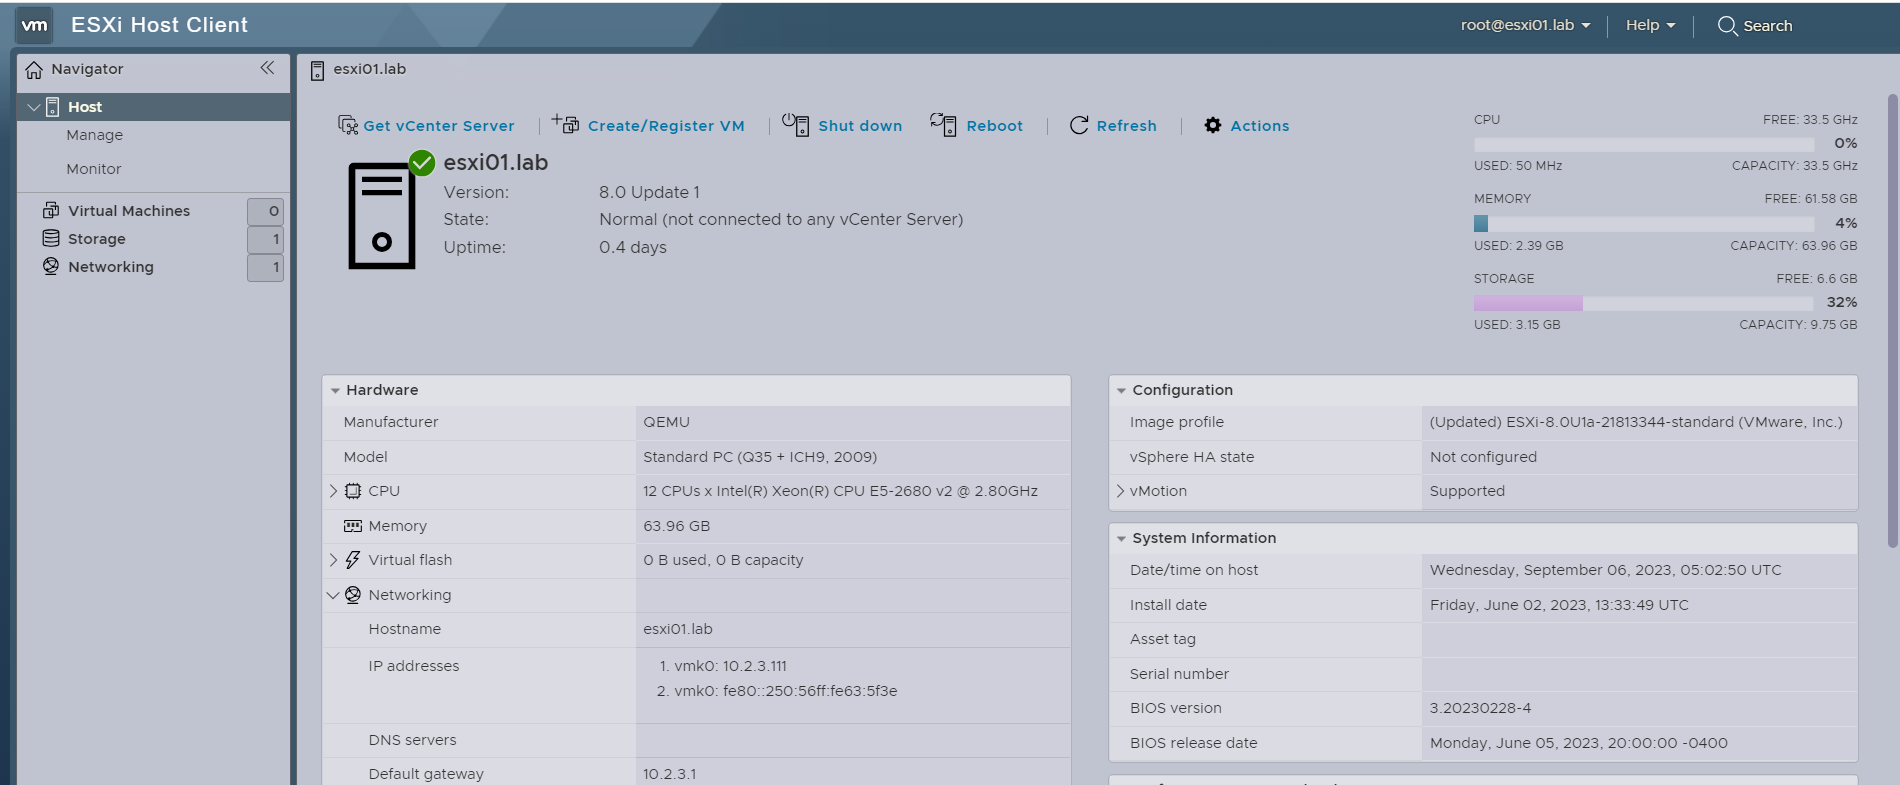
In the end, we should have the 3 VMs up & running and ready for testing.


ToDo list
1. Advanced configuration parameters
Part of the “ready for nested virtualization” experience involves a series of advanced configurations that come defined in the OVF file. Some of them are only relevant to ESXi hosts for the appliance, but some might need to be “translated” to QEMU/KVM configuration adjustments.
root@bigiron:~/esxi# grep -E "vmw:ExtraConfig|vmw:Config" Nested_ESXi8.0u1a_Appliance_Template_v1.ovf
<vmw:Config ovf:required="false" vmw:key="slotInfo.pciSlotNumber" vmw:value="16"/>
<vmw:Config ovf:required="false" vmw:key="useAutoDetect" vmw:value="false"/>
<vmw:Config ovf:required="false" vmw:key="videoRamSizeInKB" vmw:value="4096"/>
<vmw:Config ovf:required="false" vmw:key="enable3DSupport" vmw:value="false"/>
<vmw:Config ovf:required="false" vmw:key="use3dRenderer" vmw:value="automatic"/>
<vmw:Config ovf:required="false" vmw:key="graphicsMemorySizeInKB" vmw:value="262144"/>
<vmw:Config ovf:required="false" vmw:key="slotInfo.pciSlotNumber" vmw:value="35"/>
<vmw:Config ovf:required="false" vmw:key="allowUnrestrictedCommunication" vmw:value="false"/>
<vmw:Config ovf:required="false" vmw:key="backing.exclusive" vmw:value="false"/>
<vmw:Config ovf:required="false" vmw:key="connectable.allowGuestControl" vmw:value="true"/>
<vmw:Config ovf:required="false" vmw:key="backing.writeThrough" vmw:value="false"/>
<vmw:Config ovf:required="false" vmw:key="backing.writeThrough" vmw:value="false"/>
<vmw:Config ovf:required="false" vmw:key="backing.writeThrough" vmw:value="false"/>
<vmw:Config ovf:required="false" vmw:key="slotInfo.pciSlotNumber" vmw:value="33"/>
<vmw:Config ovf:required="false" vmw:key="wakeOnLanEnabled" vmw:value="false"/>
<vmw:Config ovf:required="false" vmw:key="connectable.allowGuestControl" vmw:value="true"/>
<vmw:Config ovf:required="false" vmw:key="uptCompatibilityEnabled" vmw:value="false"/>
<vmw:Config ovf:required="false" vmw:key="uptv2Enabled" vmw:value="false"/>
<vmw:Config ovf:required="false" vmw:key="cpuHotAddEnabled" vmw:value="false"/>
<vmw:Config ovf:required="false" vmw:key="cpuHotRemoveEnabled" vmw:value="false"/>
<vmw:Config ovf:required="false" vmw:key="memoryHotAddEnabled" vmw:value="false"/>
<vmw:Config ovf:required="false" vmw:key="firmware" vmw:value="efi"/>
<vmw:Config ovf:required="false" vmw:key="cpuAllocation.shares.shares" vmw:value="2000"/>
<vmw:Config ovf:required="false" vmw:key="cpuAllocation.shares.level" vmw:value="normal"/>
<vmw:Config ovf:required="false" vmw:key="simultaneousThreads" vmw:value="1"/>
<vmw:Config ovf:required="false" vmw:key="tools.syncTimeWithHost" vmw:value="true"/>
<vmw:Config ovf:required="false" vmw:key="tools.syncTimeWithHostAllowed" vmw:value="true"/>
<vmw:Config ovf:required="false" vmw:key="tools.afterPowerOn" vmw:value="true"/>
<vmw:Config ovf:required="false" vmw:key="tools.afterResume" vmw:value="true"/>
<vmw:Config ovf:required="false" vmw:key="tools.beforeGuestShutdown" vmw:value="true"/>
<vmw:Config ovf:required="false" vmw:key="tools.beforeGuestStandby" vmw:value="true"/>
<vmw:Config ovf:required="false" vmw:key="tools.toolsUpgradePolicy" vmw:value="upgradeAtPowerCycle"/>
<vmw:Config ovf:required="false" vmw:key="fixedPassthruHotPlugEnabled" vmw:value="false"/>
<vmw:Config ovf:required="false" vmw:key="powerOpInfo.powerOffType" vmw:value="soft"/>
<vmw:Config ovf:required="false" vmw:key="powerOpInfo.resetType" vmw:value="soft"/>
<vmw:Config ovf:required="false" vmw:key="powerOpInfo.suspendType" vmw:value="soft"/>
<vmw:Config ovf:required="false" vmw:key="nestedHVEnabled" vmw:value="true"/>
<vmw:Config ovf:required="false" vmw:key="vPMCEnabled" vmw:value="false"/>
<vmw:Config ovf:required="false" vmw:key="virtualICH7MPresent" vmw:value="false"/>
<vmw:Config ovf:required="false" vmw:key="virtualSMCPresent" vmw:value="false"/>
<vmw:Config ovf:required="false" vmw:key="flags.vvtdEnabled" vmw:value="false"/>
<vmw:Config ovf:required="false" vmw:key="flags.vbsEnabled" vmw:value="false"/>
<vmw:Config ovf:required="false" vmw:key="bootOptions.efiSecureBootEnabled" vmw:value="false"/>
<vmw:Config ovf:required="false" vmw:key="powerOpInfo.standbyAction" vmw:value="checkpoint"/>
<vmw:ExtraConfig ovf:required="false" vmw:key="disk.enableuuid" vmw:value="TRUE"/>
<vmw:ExtraConfig ovf:required="false" vmw:key="ehci.pcislotnumber" vmw:value="34"/>
<vmw:ExtraConfig ovf:required="false" vmw:key="ethernet0.bsdname" vmw:value="en0"/>
<vmw:ExtraConfig ovf:required="false" vmw:key="ethernet0.connectiontype" vmw:value="nat"/>
<vmw:ExtraConfig ovf:required="false" vmw:key="ethernet0.displayname" vmw:value="Ethernet"/>
<vmw:ExtraConfig ovf:required="false" vmw:key="ethernet0.filter4.name" vmw:value="dvfilter-maclearn"/>
<vmw:ExtraConfig ovf:required="false" vmw:key="ethernet0.filter4.onfailure" vmw:value="failOpen"/>
<vmw:ExtraConfig ovf:required="false" vmw:key="ethernet0.linkstatepropagation.enable" vmw:value="FALSE"/>
<vmw:ExtraConfig ovf:required="false" vmw:key="ethernet0.pcislotnumber" vmw:value="33"/>
<vmw:ExtraConfig ovf:required="false" vmw:key="ethernet1.filter4.name" vmw:value="dvfilter-maclearn"/>
<vmw:ExtraConfig ovf:required="false" vmw:key="ethernet1.filter4.onfailure" vmw:value="failOpen"/>
<vmw:ExtraConfig ovf:required="false" vmw:key="gui.fullscreenatpoweron" vmw:value="FALSE"/>
<vmw:ExtraConfig ovf:required="false" vmw:key="gui.viewmodeatpoweron" vmw:value="windowed"/>
<vmw:ExtraConfig ovf:required="false" vmw:key="hgfs.linkrootshare" vmw:value="TRUE"/>
<vmw:ExtraConfig ovf:required="false" vmw:key="hgfs.maprootshare" vmw:value="TRUE"/>
<vmw:ExtraConfig ovf:required="false" vmw:key="hpet0.present" vmw:value="TRUE"/>
<vmw:ExtraConfig ovf:required="false" vmw:key="isolation.tools.hgfs.disable" vmw:value="FALSE"/>
<vmw:ExtraConfig ovf:required="false" vmw:key="msg.autoanswer" vmw:value="true"/>
<vmw:ExtraConfig ovf:required="false" vmw:key="parallel0.autodetect" vmw:value="FALSE"/>
<vmw:ExtraConfig ovf:required="false" vmw:key="pcibridge0.pcislotnumber" vmw:value="17"/>
<vmw:ExtraConfig ovf:required="false" vmw:key="pcibridge0.present" vmw:value="TRUE"/>
<vmw:ExtraConfig ovf:required="false" vmw:key="pcibridge4.functions" vmw:value="8"/>
<vmw:ExtraConfig ovf:required="false" vmw:key="pcibridge4.pcislotnumber" vmw:value="21"/>
<vmw:ExtraConfig ovf:required="false" vmw:key="pcibridge4.present" vmw:value="TRUE"/>
<vmw:ExtraConfig ovf:required="false" vmw:key="pcibridge4.virtualdev" vmw:value="pcieRootPort"/>
<vmw:ExtraConfig ovf:required="false" vmw:key="pcibridge5.functions" vmw:value="8"/>
<vmw:ExtraConfig ovf:required="false" vmw:key="pcibridge5.pcislotnumber" vmw:value="22"/>
<vmw:ExtraConfig ovf:required="false" vmw:key="pcibridge5.present" vmw:value="TRUE"/>
<vmw:ExtraConfig ovf:required="false" vmw:key="pcibridge5.virtualdev" vmw:value="pcieRootPort"/>
<vmw:ExtraConfig ovf:required="false" vmw:key="pcibridge6.functions" vmw:value="8"/>
<vmw:ExtraConfig ovf:required="false" vmw:key="pcibridge6.pcislotnumber" vmw:value="23"/>
<vmw:ExtraConfig ovf:required="false" vmw:key="pcibridge6.present" vmw:value="TRUE"/>
<vmw:ExtraConfig ovf:required="false" vmw:key="pcibridge6.virtualdev" vmw:value="pcieRootPort"/>
<vmw:ExtraConfig ovf:required="false" vmw:key="pcibridge7.functions" vmw:value="8"/>
<vmw:ExtraConfig ovf:required="false" vmw:key="pcibridge7.pcislotnumber" vmw:value="24"/>
<vmw:ExtraConfig ovf:required="false" vmw:key="pcibridge7.present" vmw:value="TRUE"/>
<vmw:ExtraConfig ovf:required="false" vmw:key="pcibridge7.virtualdev" vmw:value="pcieRootPort"/>
<vmw:ExtraConfig ovf:required="false" vmw:key="proxyapps.publishtohost" vmw:value="FALSE"/>
<vmw:ExtraConfig ovf:required="false" vmw:key="remotedisplay.vnc.enabled" vmw:value="FALSE"/>
<vmw:ExtraConfig ovf:required="false" vmw:key="replay.supported" vmw:value="FALSE"/>
<vmw:ExtraConfig ovf:required="false" vmw:key="scsi0.pcislotnumber" vmw:value="16"/>
<vmw:ExtraConfig ovf:required="false" vmw:key="scsi0:1.virtualSSD" vmw:value="true"/>
<vmw:ExtraConfig ovf:required="false" vmw:key="scsi0:2.virtualSSD" vmw:value="true"/>
<vmw:ExtraConfig ovf:required="false" vmw:key="serial0.autodetect" vmw:value="FALSE"/>
<vmw:ExtraConfig ovf:required="false" vmw:key="usb.pcislotnumber" vmw:value="32"/>
<vmw:ExtraConfig ovf:required="false" vmw:key="uuid.action" vmw:value="create"/>
<vmw:ExtraConfig ovf:required="false" vmw:key="virtualhw.productcompatibility" vmw:value="hosted"/>
<vmw:ExtraConfig ovf:required="false" vmw:key="vmci0.pcislotnumber" vmw:value="35"/>
<vmw:ExtraConfig ovf:required="false" vmw:key="vmotion.checkpointfbsize" vmw:value="65536000"/>
<vmw:ExtraConfig ovf:required="false" vmw:key="migrate.hostLog" vmw:value="./Nested_ESXi8.0u1a_Appliance_Template-222fd488.hlog"/>With more time, I’ll take a look at the list and provide an update if needed.
2. cloud-init
PVE provides support for cloud-init as a way to automate VM provisioning & initial configuration. ESXi doesn’t provide a cloud-init agent out of the box.
I’ve found a basic implementation of a cloud-init agent for ESXi by Gonéri Le Bouder, which some people have reported to be working to deploy ESXi on top of Openstack. Pending to review how to inject that script in our freshly downloaded appliance (encrypted local.tgz proven to be cumbersome for this usecase).